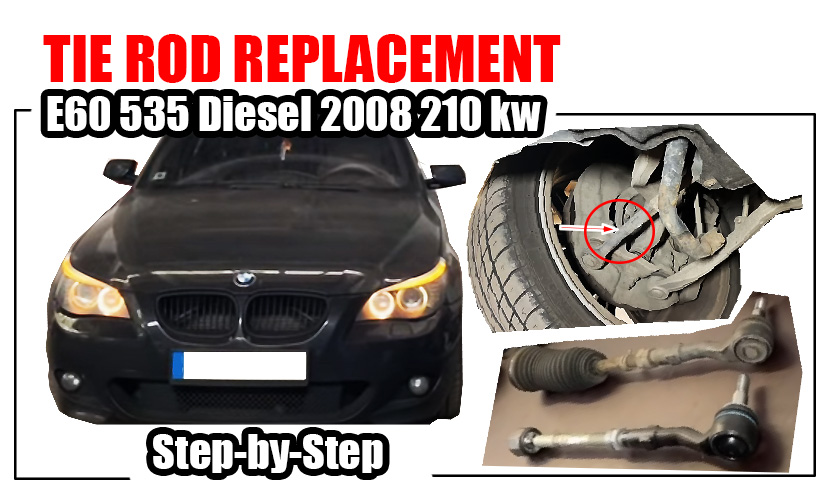
BMW E60 535 Diesel 2008 210 kw
How can you determine if your steering linkage is damaged?
Shake the wheel like this, and observe the following.
Camber adjustments should only be made with proper wrenches, applying moderate force, without heating the rods, and without hammering them. Striking the steering components can cause damage to the steering mechanism.
Replacing tie rods
Replacing tie rods is a critical maintenance task that ensures proper steering and vehicle safety. Here’s a step-by-step guide to assist you:
· Remove the Wheel: Loosen the lug nuts, elevate the vehicle using a lift, and then fully remove the wheel to access the tie rod assembly.
· Remove Protective Covers: Detach any protective shields or covers that obstruct access to the tie rod and steering components.
· Remove the Boot: Slide off the rubber boot that shields the inner tie rod to expose the joint.
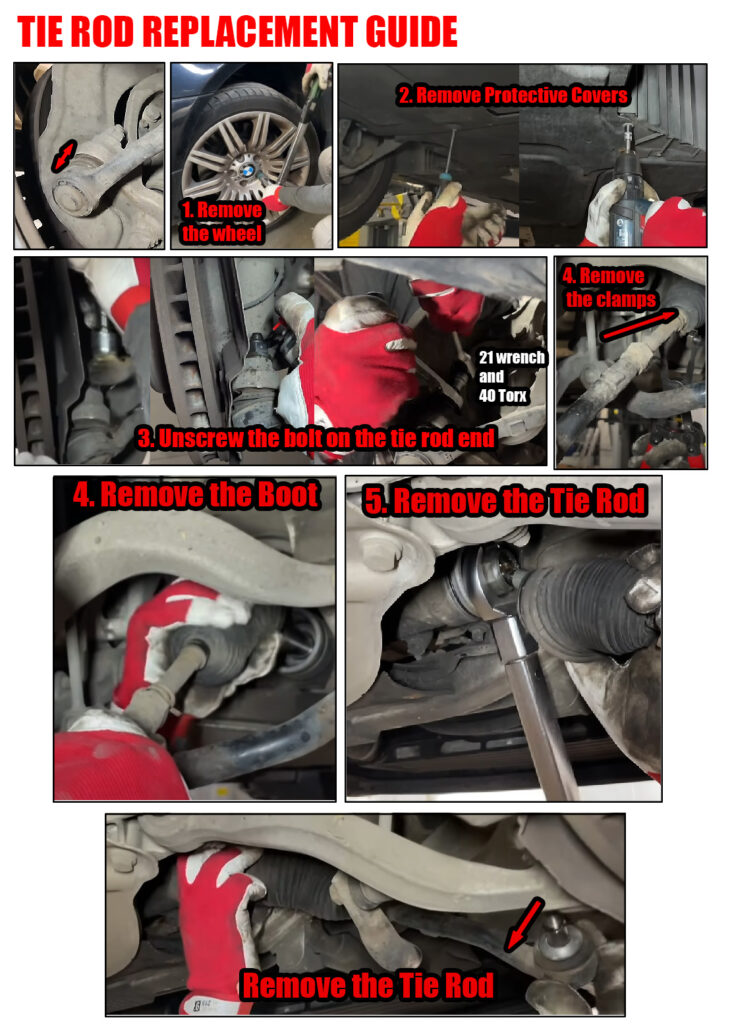
· Detach the Tie Rod End: Remove the cotter pin and loosen the castle nut connecting the outer tie rod end to the steering knuckle. Use a tie rod puller or a hammer to separate the tie rod end from the knuckle.
· Clean the Threads: Thoroughly clean any rust or debris from the threads of the inner tie rod to ensure smooth removal and installation.
· Unscrew the Inner Tie Rod: Using a wrench, unscrew the inner tie rod while securely holding the central section to prevent damage.
· Remove Clamps and Boot: Take off any clamps securing the boot and then remove the boot entirely to access the inner tie rod.

· Remove the Rubber Ring: If present, remove the rubber ring located beneath the boot to fully expose the inner tie rod joint.
Loosen the Tie Rod: Compress the tie rod into the steering rack to reduce tension during loosening. Utilize an appropriate insertion wrench for this task.
Remove the Tie Rod: If the tie rod drops downward upon removal, it indicates significant wear. If it remains stable, it is still in acceptable condition.
Replace Nuts if Using Aftermarket Tie Rods: When installing non-original tie rods, it is advisable to use original manufacturer nuts, as they are typically more robust.
Install New Dust Boots: Purchase new original dust boots, which include proper steel clamps. Note that the rubber ring on the steering rack is usually only included with original parts; if using aftermarket components, order this ring separately.
Apply Specialized Grease: Apply steering rack-specific grease to the area on the rack where the dust boot’s sealing section will be positioned.
Position the Dust Boot: Place the dust boot onto the rack without fully seating it, and then install the clamp.
Install New Nut and Cone: Attach a new nut and position the cone appropriately.
Lubricate the Tie Rod End: Apply copper grease to the tie rod end, ensuring the cone remains free of lubricant.
Set the Length and Secure the Nut: Adjust the tie rod to the correct length and secure the nut firmly.
Replace the Sealing Ring: Clean the area thoroughly and apply steering rack grease before installing the new sealing ring.
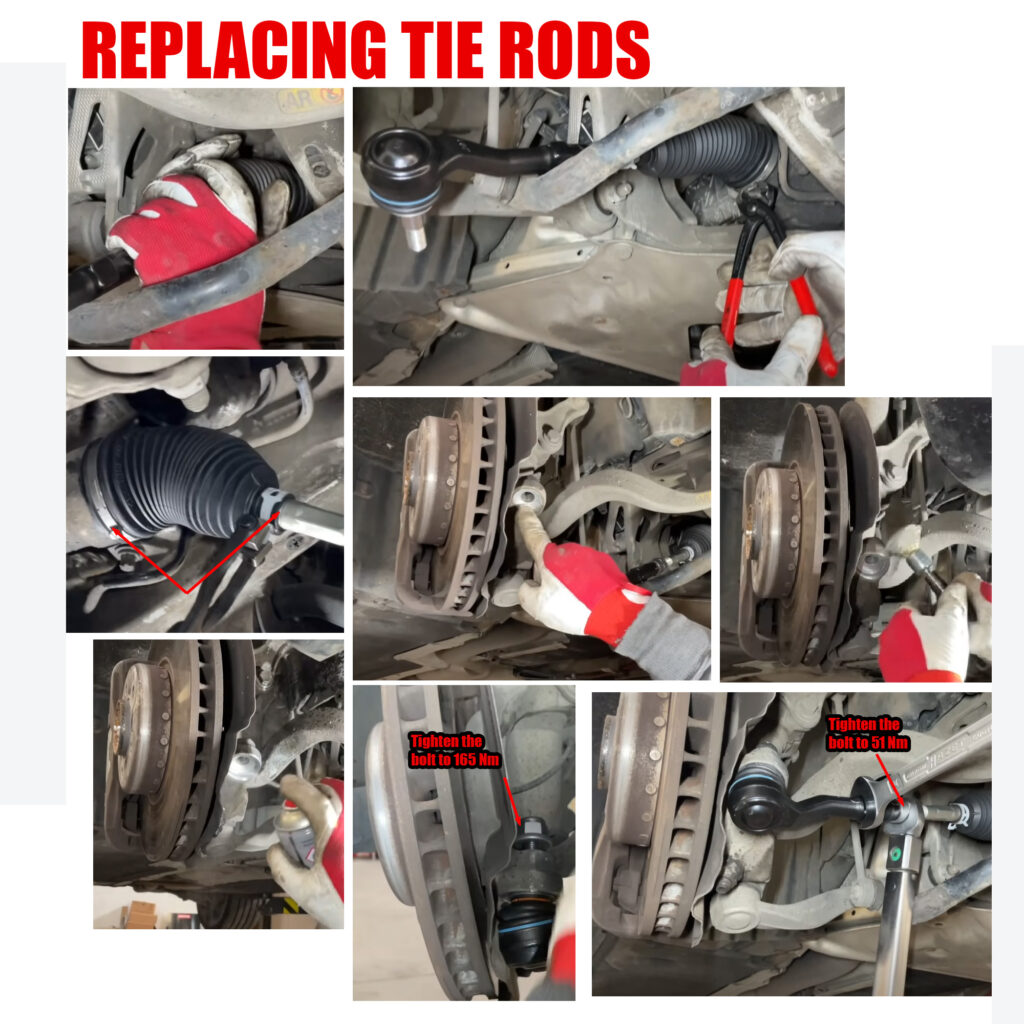
Insert the Steering Shaft: Slide the steering shaft inward to its proper position.
Attach the Tie Rod: Secure the tie rod to the steering assembly.
Torque Specifications: Tighten the tie rod using a torque wrench to 110 Nm.
Install the Clamp: Place the clamp onto the assembly.
Secure the Dust Boot: Fully seat the dust boot onto the rack.
Tighten Dust Boot Clamps: Secure both clamps (1 and 2) on the dust boot.
Clean Contact Surfaces: Ensure all mating surfaces are clean and free of debris.
Torque the Tie Rod End: Hold the tie rod end steady and tighten to 51 Nm.
Note: Repeat the above steps for the left tie rod, including removing protective plastic covers and the wheel, and applying lubrication as necessary. After completing the replacement, it is essential to perform a wheel alignment to ensure proper vehicle handling.
