

Quick and Easy Timing Belt Replacement on Your VW: Save Time and Effort
Replacing the timing belt on a Volkswagen requires technical skills, the right tools, and attention to detail. The procedure can vary depending on your VW model and engine type, so consult the vehicle’s service manual for specific details.
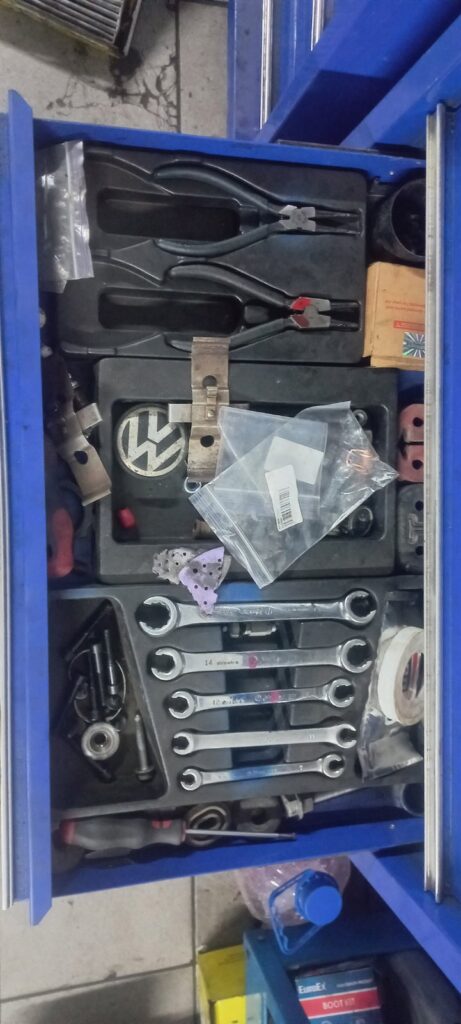
Tools You’ll Need:
- A complete set of wrenches and sockets.
- Torque wrench.
- Screwdrivers (flathead and Phillips).
- Engine locking tools (specific to your VW engine).
- Timing chain kit (including chain, tensioner, and guides).
- Jack and jack stands.
- Drain pan and oil for refill.
- Clean rags and gloves.
Always compare the new parts with the ones you’re replacing to ensure they are correctly matched. This simple step helps confirm compatibility and prevents installation errors.
During routine maintenance, when replacing the timing belt kit, it’s often recommended to also replace the engine oil, oil filter, air filter, cabin filter, and water pump. More information about Engine oil and filter replacement you can find here.
Step-by-Step Guide:
1. Prepare the Vehicle:
- Park the car on a flat surface and engage the parking brake.
- Disconnect the negative battery terminal to ensure safety.
- Use the jack to lift the car and secure it with jack stands if access to the bottom of the engine is required.

2. Drain Fluids:
• Place a drain pan under the engine.
• Drain the engine oil (To do this, unscrew the drain plug using a ratchet with a 19 nozzle.)
3. Remove Components:
Remove the expansion tank mounting bolts and carefully pull the expansion tank out of the latches. Then unscrew the fuel filter mounting bolts and move everything together away from the place where you will change the timing belt. Use wire or hooks to secure them to other elements.
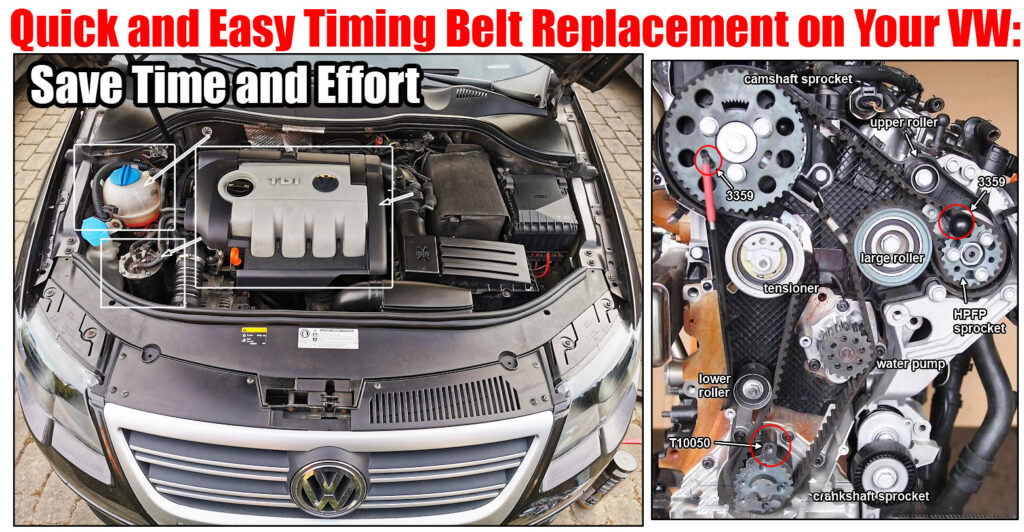
• Take off the engine cover and other accessories obstructing access to the timing belt cover.
• Remove the serpentine belt and other pulleys if necessary.
• Take off the timing belt cover by unscrewing the bolts.
4. Align Timing Marks:
- Rotate the crankshaft manually using a wrench until the timing marks on the camshaft and crankshaft are aligned. This ensures proper timing.
Two crankshaft revolutions equal one camshaft revolution.
For convenience, use the arrow mark on the camshaft sprocket, which should point to 11 or 12 o’clock. Also a mark on the high pressure fuel pump. And of course on the crankshaft. We lock all three marks using special clamps.
5. Remove the Old Timing Belt:
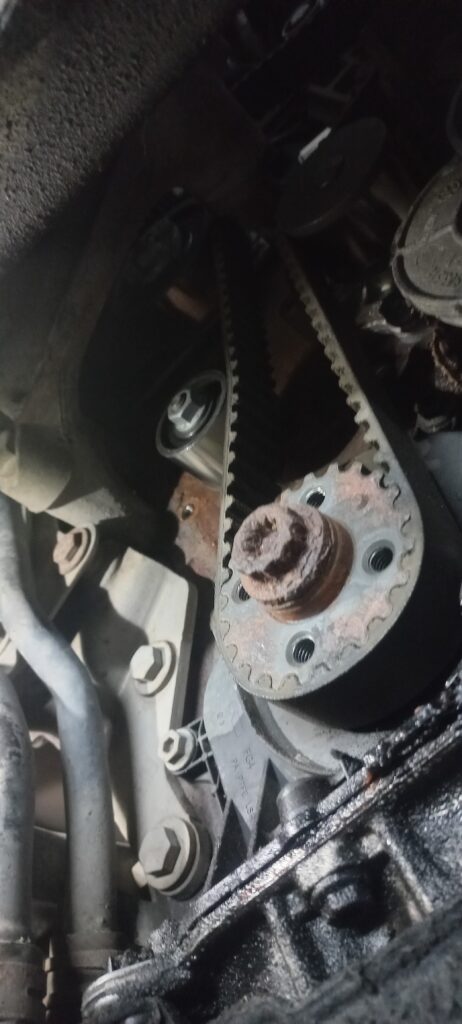
Release the tension on the timing belt by loosening the tensioner.
Carefully remove the belt, tensioner, and pulleys if necessary.
6. Install the New Timing Belt:

If you change the pump, you should do this before installing the timing belt. Because coolant will flow out from cooling system.
- Install the new tensioner and pulleys included in your kit.
- Place the new belt, ensuring it aligns with the timing marks on both the crankshaft and camshaft sprockets.
After installing the timing belt, turn the crankshaft twice until the marks match, install the fixers, and if the belt is tensioned and the fixers are in place, then the belt is installed correctly. Be sure to remove the fixers and other tools that were used to avoid damage.
7. Tension the Belt:
- Adjust the tensioner to apply the correct tension to the timing belt. Follow the torque specifications from the service manual.
- Ideally, the tensioner arrow should point in the middle of the mark, but keep in mind that the belt will tighten, so set it a little more to the end of the mark.
8. Reassemble the Engine:
- Reinstall the timing belt cover, valve cover, and all removed components.
- Replace the gaskets if needed and tighten bolts to the specified torque.
9. Refill Fluids:
- Refill the engine with oil and coolant.
10. Test the Engine:
- Reconnect the battery.
- Start the engine and let it idle, listening for unusual noises.
- Check for oil or coolant leaks around the timing belt cover.
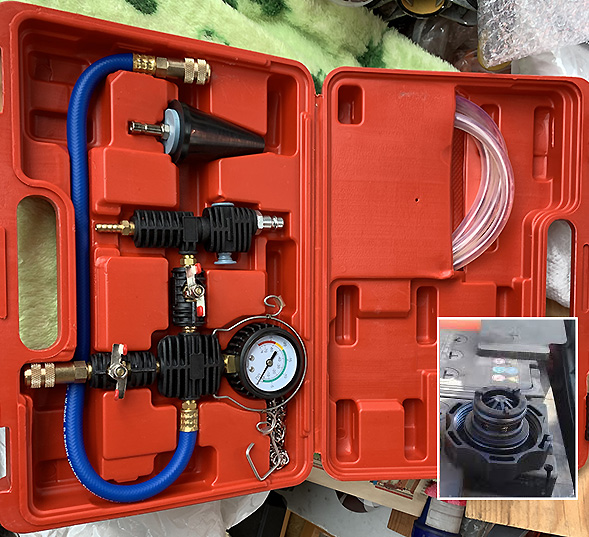
- It is best to evacuate the cooling system and check whether the pressure in the system drops. If the pressure does not drop, then there are no leaks, add coolant to the level and close the cap of the expansion tank.
Tips:
- Always use genuine or high-quality replacement parts.
- Double-check alignment before reassembling.
- If you’re not confident in performing this repair, consider seeking professional help.
By following these steps, you can replace the timing belt on your VW. However, precise execution is critical, as improper timing can cause serious engine damage.